Elegant Christmas Card and a Little Sneak Peek
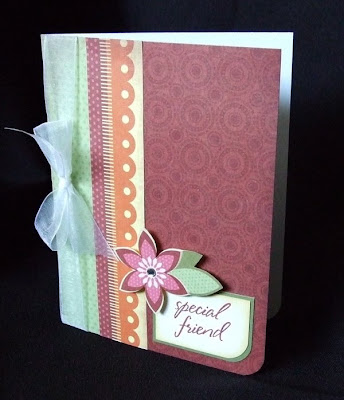
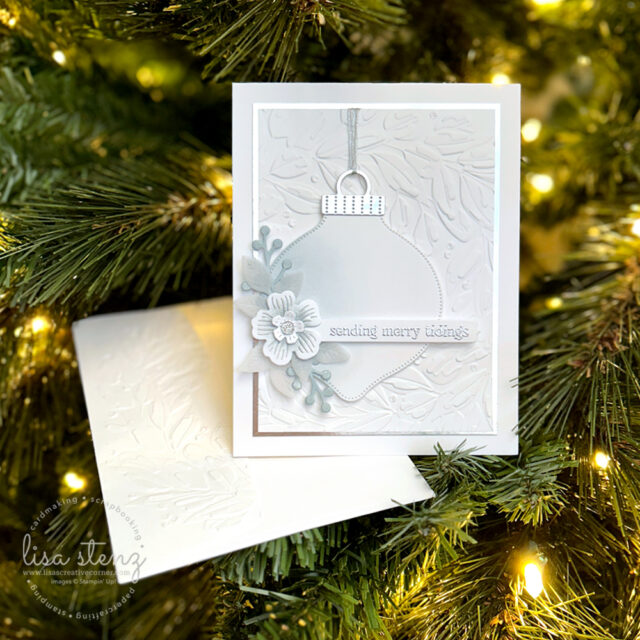
Today I’m excited to share a Christmas card I designed that combines a few current favorites with a brand new bundle coming in January called Fragrant Layers. This beautiful bundle includes flowers, leaves, a tag, and several lovely sentiments, and it’s one I think many of you are going to fall in love with.
If you are a current customer of mine and have opted in to receive communications, you will be receiving a copy of the new catalog in the mail. If you would like a catalog and aren’t a current customer or if you are opted out of communications in your Stampin’ Up! account, feel free to reach out to me. I would be happy to send one your way.
Card Details
To create this card, I started by die cutting the ornament using the Bauble Blooms Dies. I lightly blended Cloud Cover Ink over the ornament using a Blending Brush to give it soft dimension. Cloud Cover ink is currently only available as a mini ink spot and can be found in the Classic Stampin’ Spots Assortment #1. The ornament topper was die cut from Silver Foil Sheet and attached to the top of the ornament.
Next, I embossed a piece of Basic White Thick Cardstock with the Traditional Wreath 3D Embossing Folder. I matted this layer with Silver Foil to create a thin border, then adhered it to a standard A2 card base that opens at the top.
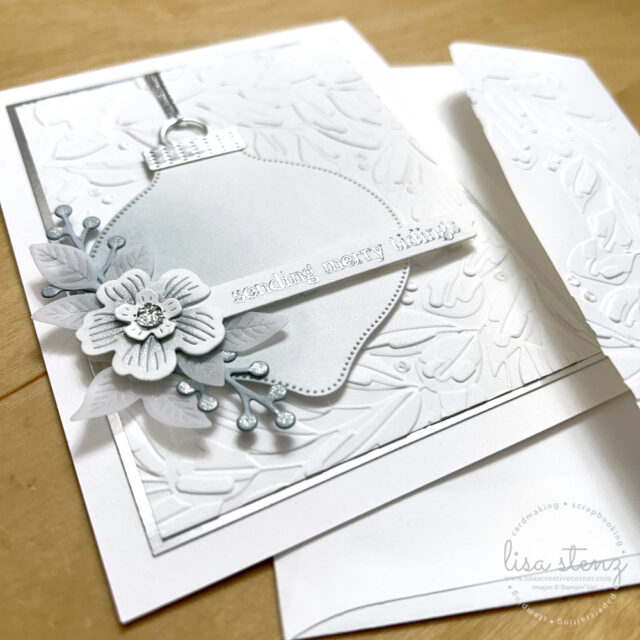
I attached the ornament to the left side of the card using Dimensionals. For the floral accent, I used dies from the new Fragrant Layers bundle to create the layered flower and added vellum leaves from the same set. I added a tiny bit of Cloud Cover ink to the flower with a Small Blending Brush. The berry branches were die cut from Cloud Cover Cardstock using a die from the Branching Out set.
To add a touch of sparkle, I applied Wink of Stella to the berries and the flower. While it’s subtle and a bit hard to capture in photos, it really adds a beautiful shimmer in person. A small silver Drusy embellishment in the center finishes off the flower perfectly.
The sentiment, from the Jolly Delivery Stamp Set, was embossed onto a thin strip cut using a die from the Delightful Wishes set. I attached the sentiment strip to the card with Mini Dimensionals.
Finishing Touch
For a fun coordinating detail, I embossed the envelope flap with the Traditional Wreath 3D Embossing Folder. I love adding little touches like this to make the card feel extra special before it’s even opened.
I’ll be sending this card, along with a small gift, to my first level team members as an end of the year thank you for being part of our SU! family. I love being able to share my creativity with my team and let them know how much I appreciate being on this crafting journey together.
I hope this project gives you a little inspiration if you’re still working on your holiday cards this season. 🎄
Product List![Fragrant Layers Bundle (English) [ 167155 ]](https://lisascreativecorner.com/wp-content/uploads/2026/01/a2994daa7a820d81f6e07b499a879383.jpg "Fragrant Layers Bundle (English) [ 167155 ]")
![Bauble Blooms Dies [ 166095 ]](https://lisascreativecorner.com/wp-content/uploads/2025/12/8076456f8cffe8e89e4bf482a76a12bf.jpg "Bauble Blooms Dies [ 166095 ]")
![Delightful Wishes Dies (English) [ 164707 ]](https://lisascreativecorner.com/wp-content/uploads/2025/12/24350c0be09faf8db44949ed004ce168.jpg "Delightful Wishes Dies (English) [ 164707 ]")
![Branching Out Dies [ 165775 ]](https://lisascreativecorner.com/wp-content/uploads/2025/12/26e868acc358542c8a9a2f91833cbae6-1.jpg "Branching Out Dies [ 165775 ]")
![Jolly Delivery Photopolymer Stamp Set (English) [ 169217 ]](https://lisascreativecorner.com/wp-content/uploads/2025/12/7404bd66ed286c01a48a411cbaa5758c.jpg "Jolly Delivery Photopolymer Stamp Set (English) [ 169217 ]")
![Traditional Wreath 3 D Embossing Folder [ 165874 ]](https://lisascreativecorner.com/wp-content/uploads/2025/12/865bf418ac50c80aefc593ae5e4a1175.jpg "Traditional Wreath 3 D Embossing Folder [ 165874 ]")
![Drusy Adhesive Backed Embellishments [ 164223 ]](https://lisascreativecorner.com/wp-content/uploads/2025/12/32c24456c836a2fdc56f232897fb8c44.jpg "Drusy Adhesive Backed Embellishments [ 164223 ]")
![Silver 12" X 12" (30.5 X 30.5 Cm) Foil Sheets [ 163387 ]](https://lisascreativecorner.com/wp-content/uploads/2025/12/bd6f1f96b35ef3338a6a2440fd256fdc-1.jpg "Silver 12\" X 12\" (30.5 X 30.5 Cm) Foil Sheets [ 163387 ]")
![Basic White 8 1/2" X 11" Thick Cardstock [ 159229 ]](https://lisascreativecorner.com/wp-content/uploads/2025/12/8c2a8a3b8ff25be10ec2d7cecdaecf11-1.jpg "Basic White 8 1/2\" X 11\" Thick Cardstock [ 159229 ]")
![Cloud Cover 8 1/2" X 11" Cardstock [ 165621 ]](https://lisascreativecorner.com/wp-content/uploads/2025/12/8d4fd2a444f3c109262dbcfc7d2e8559.jpg "Cloud Cover 8 1/2\" X 11\" Cardstock [ 165621 ]")
![Vellum 12" X 12" (30.5 X 30.5 Cm) Specialty Paper [ 167099 ]](https://lisascreativecorner.com/wp-content/uploads/2025/12/67c81ee9a4c0c9eed8be0e2bb1604e3f-1.jpg "Vellum 12\" X 12\" (30.5 X 30.5 Cm) Specialty Paper [ 167099 ]")
![Metallics Embossing Powders [ 155555 ]](https://lisascreativecorner.com/wp-content/uploads/2025/12/c0e7bb876199a273aa6ab8ab02b7d655.jpg "Metallics Embossing Powders [ 155555 ]")
![Versamark Pad [ 102283 ]](https://lisascreativecorner.com/wp-content/uploads/2025/12/54cfeab1549411ad30202311b52c4503.jpg "Versamark Pad [ 102283 ]")
![Heat Tool (Us And Canada) [ 129053 ]](https://lisascreativecorner.com/wp-content/uploads/2025/12/4c9a3db51f842026e2f935a2d7116799.jpg "Heat Tool (Us And Canada) [ 129053 ]")
![Clear Wink Of Stella Glitter Brush [ 141897 ]](https://lisascreativecorner.com/wp-content/uploads/2025/12/76e24339f8b17924d6f0d5421c4787ec-1.jpg "Clear Wink Of Stella Glitter Brush [ 141897 ]")
![Classic Stampin' Spot Small Assortment 1 [ 166716 ]](https://lisascreativecorner.com/wp-content/uploads/2025/12/719d04452214b8e990fc1029c646ce27.jpg "Classic Stampin' Spot Small Assortment 1 [ 166716 ]")
![Small Blending Brushes [ 160518 ]](https://lisascreativecorner.com/wp-content/uploads/2025/12/9fbafdd6b16379bcf7c1c22148cf5a9f.jpg "Small Blending Brushes [ 160518 ]")
![Mini Stampin' Dimensionals [ 144108 ]](https://lisascreativecorner.com/wp-content/uploads/2025/12/dd5ef75bd31a32ecdc6a140a2d9ad7db-1.jpg "Mini Stampin' Dimensionals [ 144108 ]")
![Stampin' Dimensionals [ 104430 ]](https://lisascreativecorner.com/wp-content/uploads/2025/12/40efb008ee05b6faec44ebafc8937e58-1.jpg "Stampin' Dimensionals [ 104430 ]")
![Stampin' Cut & Emboss Machine [ 149653 ]](https://lisascreativecorner.com/wp-content/uploads/2025/12/909f32cc4d93a35369fa22db36e19902-1.jpg "Stampin' Cut & Emboss Machine [ 149653 ]")