
Sonoma Boxed Wedding Invitation

As promised, here are a few more details on the wedding invitation that I designed using Close to my Heart’s new Sonoma paper collection and the Art Philosophy Cricut cartridge. I started out creating a petal box with the AP cartridge. I cut the box at 11″ out of the floral Sonoma paper. I folded the box with the floral pattern on the outside. (I love that the backside of the paper is pretty patterned Olive color so the inside of the box has a nice color to it. Plus the paper is cardstock weight, so it makes for a nice box.)


To make the wrap around the box, the petal box was adhered onto onto the right side of a piece of Smokey Plum cardstock that was cut at 10-5/8″ x 5″ and scored at 4-7/8″ and 5-3/4″. Then I cut a piece of Smokey Plum cardstock at 4-3/4″ x 5″ and folded it in half. I used a circle punch to cut a small notch on the top of one side and then adhered the two sides together to make a pocket. I tied some Colonial White ribbon around it and then adhered it to the left side of the inside of the wrap. I placed a response card and a reception card inside the pocket. (The cards were printed on Colonial White cardstock and matted on Olive cardstock.)

The actual invitation rests inside of the box on a piece of Colonial White cardstock that was folded down on two sides to “hold up” the invitation. I tied some Colonial White ribbon around it to hold it in place.
Can you see how the Colonial White cardstock was folded to hold the invitation closer to the top of the box? It isn’t really meant to be taken out, but I wanted to show you how the invitation was held inside the box.

Here is a close up of the printed invitation. I used a font called Brock Script and printed it on some Colonial White cardstock. Then double matted it onto Petal and Smokey Plum cardstock.

The outside of the invitation wrap is layered with another piece of floral paper from the Sonoma collection matted onto Olive cardstock. Then I stamped a piece of CW cardstock with a sentiment from the Key Moments stamp set, matted it onto some Smokey Plum cardstock and adhered it with some 3-D Foam Tape. The 3-D flower was made using the Art Philosophy cartridge. I cut a 3-1/2″ flower from some Colonial White cardstock, inked the edges with Smokey Plum ink and then rolled it. After gluing the flower, I used a toothpick to turn the edges down. (You can see my 3-D flower video tutorial here.) The leaves were also cut with the AP cartridge from some Olive cardstock and then folded, crinkled, and inked with Olive ink.

Obviously this invitation would either need to be delivered by hand or mailed in a box. But imagine how surprised your guests will be when they open the box to reveal the special invitation inside!
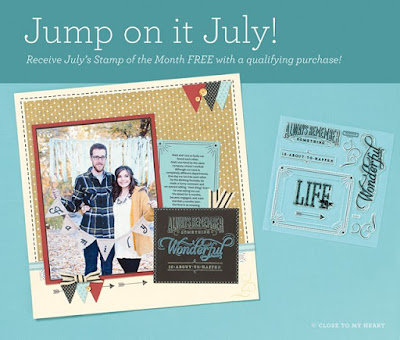
Remember, you can still order the AWESOME new Art Philosophy cartridge bundle and get the August Stamp of the month, Wicked, the A Typeset stamp set, and the DOUBLE Pair-a-Phrase set for only $5 more! Click here or contact me to place your order.

Wow Lisa! Stunning project!
That is so gorgeous! LOVE it!
Absolutely fabulous!!!
These are amazing. Thanks for sharing them with us.
Absolutely gorgeous! I love reading your blog, I really see how much time you put into it. You are an inspiration to so many of us CTMH consultants. Great work Lisa!!
I love these!! How many sheets of the B&T papers did you use per invitation?
It's absolutly gorgous Lisa!
Blown Away! You did an amazing job on this, it is beautiful!
Your artwork just takes my breath away every time! Thank you for sharing it, and for sharing the instructions as well. It's absolutely beautiful!
I would be BLOWN AWAY to receive a wedding invitation like this! I don't think the Royal Wedding invitations were THIS nice! Amazing, as always!
Wow, how do you keep coming up with such amazing ideas? I love it!
Beautiful project!! I arrived here from your youtube video on your wreath. Wonderful tutorial!