
August Project Kit – Label Me Grateful Irresistible Card Set
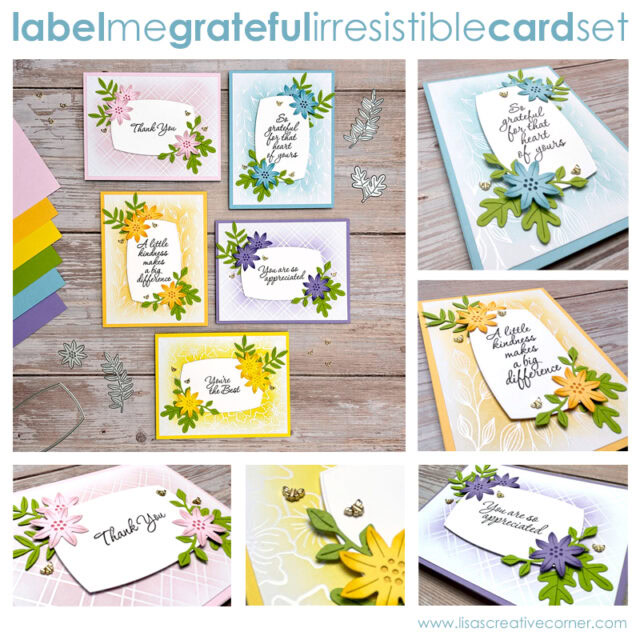
With August’s project kit you will make 5 standard A2 sized cards using Stampin’ Up’s Label Me Grateful stamp and die bundle and Irresistible Designs Specialty Designer Series Paper. You can order all of the supplies needed to make the project using the links at the bottom of this post.
August Project Kit – Free with Purchase!
When you order the Label Me Grateful Stamp & Die Bundle along with the Irresistible Designs Specialty Designer Series Paper during August, I’ll send you a FREE project kit as a special thank you!
Your kit will include:
- All the cardstock pieces you’ll need (you’ll do the die cutting)
- Envelopes
- A full color, printed, step-by-step instruction guide with photos
Kits will be shipped by the end of the month.
If you’d prefer the full step-by-step tutorial guide only, you can also purchase the PDF version of the guide separately here.
Another way to get all of my instruction guides for free is to join my Stampin’ Up! team. (One of the perks of being on my team is that I share all of my guides for free in our team Facebook group!) Visit my FAQ page here for more info.
Here are a few photos of the project…
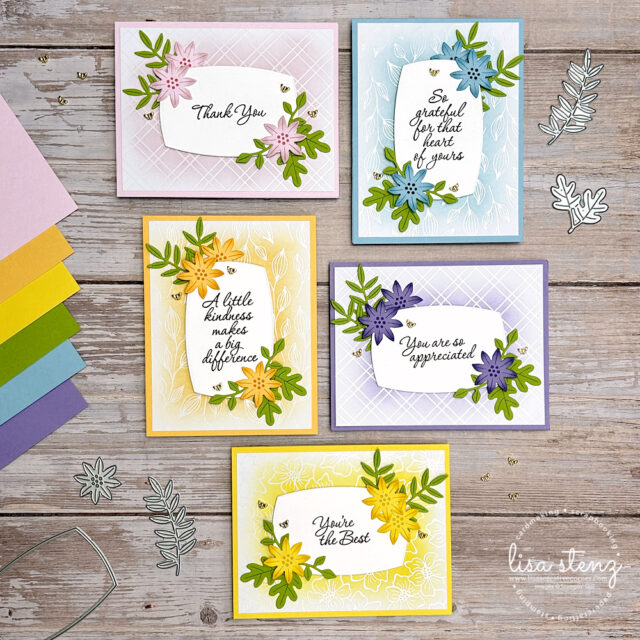
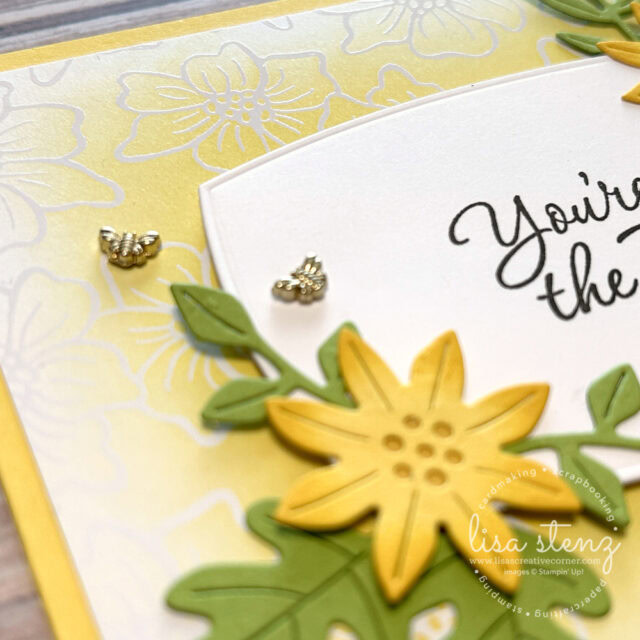
Because the Irresistible DSP has UV-coated patterns that resist ink, it works beautifully for emboss-resist techniques like the one we will use on these cards.
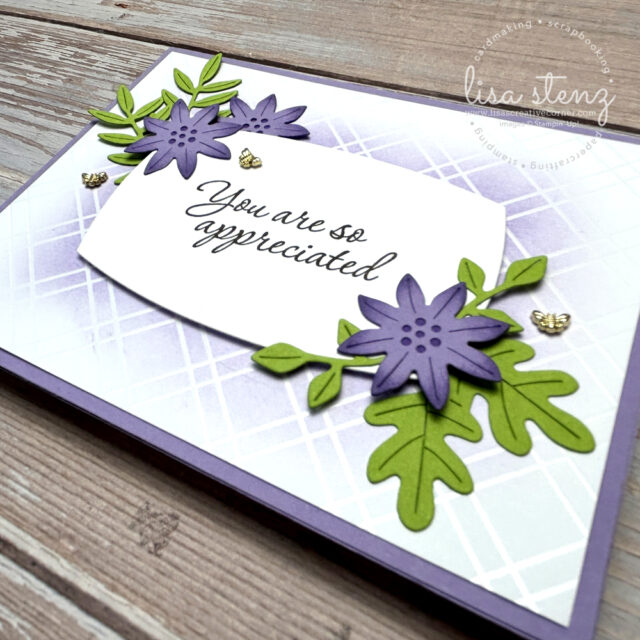


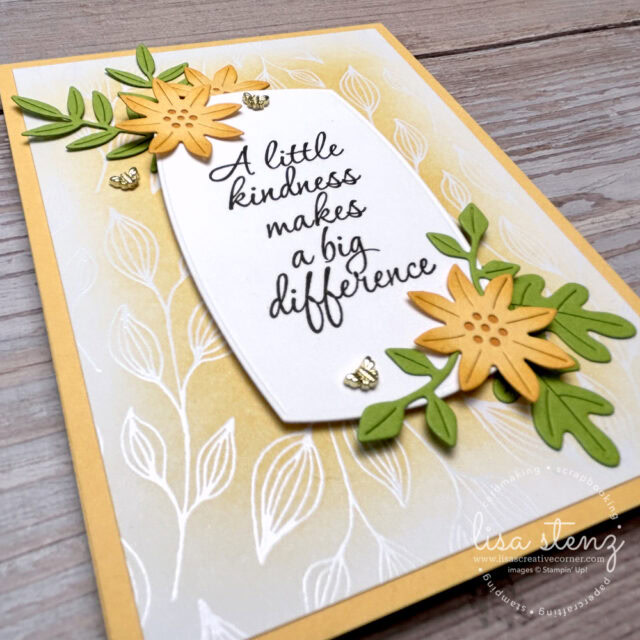
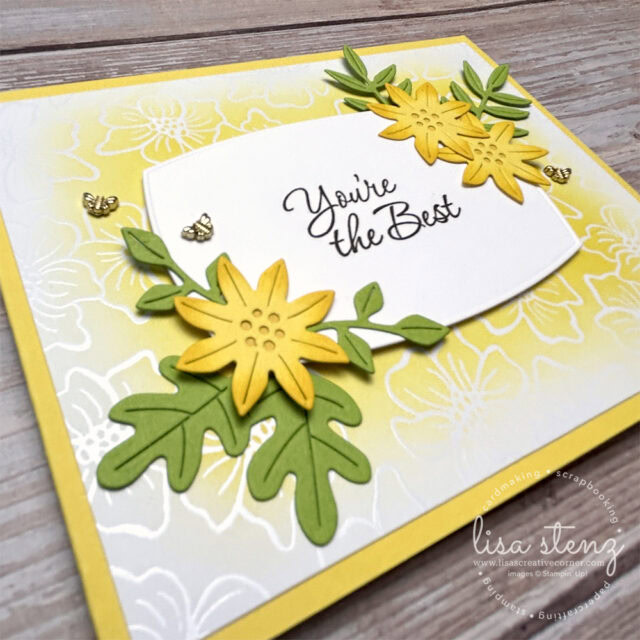
The tiny gold Bee Trinkets add an adorable touch to the cards.
Don’t forget that you can get a free kit with precut cardstock (not including die cuts), envelopes, and a printed step-by-step instruction guide absolutely free if you order the Label Me Grateful stamp and die bundle and Irresistible Designs Specialty Designer Series Paper from my website during the month of August. Kits will be mailed out by the end of the month.
By placing an order on my shopping website, you will also earn points towards my new Loyalty Rewards Program! (Visit my Loyalty Rewards Program page here for more information.) PLUS, if you have a Stampin’ Up! online account and opt in, you will also earn Stampin’ Rewards! (Visit the Stampin’ Rewards Program page here for more information.)
For those who would like to purchase just the step-by-step tutorial guide, you can order the pdf here. Another way to get all of my instruction guides for free is to join my Stampin’ Up! team. Visit my FAQ page here for more info.
Click on the links below to order the supplies for this project.
Product List![Label Me Grateful Bundle (English) [ 166112 ]](https://lisascreativecorner.com/wp-content/uploads/2025/08/0f1c7ea0c7bd01e14d51f55389524747.jpg "Label Me Grateful Bundle (English) [ 166112 ]")
![Irresistible Designs 12" X 12" (30.5 X 30.5 Cm) Specialty Designer Series Paper [ 165305 ]](https://lisascreativecorner.com/wp-content/uploads/2025/08/b44f6bcb737565d3f5046d1ea5fda9f5.jpg "Irresistible Designs 12\" X 12\" (30.5 X 30.5 Cm) Specialty Designer Series Paper [ 165305 ]")
![Tiny Bee Trinkets [ 164714 ]](https://lisascreativecorner.com/wp-content/uploads/2025/08/7ec9d96effe49c8d22498770bee0ac4e.jpg "Tiny Bee Trinkets [ 164714 ]")
![Strawberry Slush 8 1/2" X 11" Cardstock [ 165625 ]](https://lisascreativecorner.com/wp-content/uploads/2025/08/a7d6c0133d89e0445b01434009088eea.jpg "Strawberry Slush 8 1/2\" X 11\" Cardstock [ 165625 ]")
![Bubble Bath 8 1/2" X 11" Cardstock [ 161718 ]](https://lisascreativecorner.com/wp-content/uploads/2025/08/838dcbd3dd87f57710521561654f1f60.jpg "Bubble Bath 8 1/2\" X 11\" Cardstock [ 161718 ]")
![Pumpkin Pie 8-1/2" X 11" Cardstock [ 105117 ]](https://lisascreativecorner.com/wp-content/uploads/2025/08/00c20c08f545b8e6744fdabf2cd860dd.jpg "Pumpkin Pie 8-1/2\" X 11\" Cardstock [ 105117 ]")
![Peach Pie 8 1/2" X 11" Cardstock [ 163799 ]](https://lisascreativecorner.com/wp-content/uploads/2025/08/78338a991a92d872a71ad79322b4e4b5.jpg "Peach Pie 8 1/2\" X 11\" Cardstock [ 163799 ]")
![Crushed Curry 8-1/2" X 11" Cardstock [ 131199 ]](https://lisascreativecorner.com/wp-content/uploads/2025/08/ab2144f35356c3842dbab8fe63b5a3fb.jpg "Crushed Curry 8-1/2\" X 11\" Cardstock [ 131199 ]")
![Daffodil Delight 8-1/2" X 11" Cardstock [ 119683 ]](https://lisascreativecorner.com/wp-content/uploads/2025/08/02a61bb40fac9c2b0aea531d7f6d7622.jpg "Daffodil Delight 8-1/2\" X 11\" Cardstock [ 119683 ]")
![Granny Apple Green 8-1/2" X 11" Cardstock [ 146990 ]](https://lisascreativecorner.com/wp-content/uploads/2025/08/d13546e4311e21d711ec5569f986f9d5.jpg "Granny Apple Green 8-1/2\" X 11\" Cardstock [ 146990 ]")
![Balmy Blue 8-1/2" X 11" Cardstock [ 146982 ]](https://lisascreativecorner.com/wp-content/uploads/2025/08/757dcbc334db8761624bf930cfc179b1.jpg "Balmy Blue 8-1/2\" X 11\" Cardstock [ 146982 ]")
![Night Of Navy 8-1/2" X 11" Cardstock [ 100867 ]](https://lisascreativecorner.com/wp-content/uploads/2025/08/3e65474632becf43f07166ddf0d980aa.jpg "Night Of Navy 8-1/2\" X 11\" Cardstock [ 100867 ]")
![Highland Heather 8-1/2" X 11" Cardstock [ 146986 ]](https://lisascreativecorner.com/wp-content/uploads/2025/08/43be8db06da995a75485bc65fa869331.jpg "Highland Heather 8-1/2\" X 11\" Cardstock [ 146986 ]")
![Gorgeous Grape 8-1/2" X 11" Cardstock [ 146987 ]](https://lisascreativecorner.com/wp-content/uploads/2025/08/0ba0496a2f272f56b4717e4e3d6da298.jpg "Gorgeous Grape 8-1/2\" X 11\" Cardstock [ 146987 ]")
![White Willow 12" X 12" (30.5 X 30.5 Cm) Cardstock [ 166703 ]](https://lisascreativecorner.com/wp-content/uploads/2025/08/ecd0677988a8c1e3125ef552965fd1b3.jpg "White Willow 12\" X 12\" (30.5 X 30.5 Cm) Cardstock [ 166703 ]")
![Bubble Bath Classic Stampin' Pad [ 161664 ]](https://lisascreativecorner.com/wp-content/uploads/2025/08/9fbd3808724c0b1bff5e0d19aa8138e7.jpg "Bubble Bath Classic Stampin' Pad [ 161664 ]")
![Peach Pie Classic Stampin Pad [ 163810 ]](https://lisascreativecorner.com/wp-content/uploads/2025/08/7f92eae055938d053bc624fa5e7f72d4.jpg "Peach Pie Classic Stampin Pad [ 163810 ]")
![Daffodil Delight Classic Stampin' Pad [ 147094 ]](https://lisascreativecorner.com/wp-content/uploads/2025/08/cde7a562247662f8f15a62db08e7a965.jpg "Daffodil Delight Classic Stampin' Pad [ 147094 ]")
![Balmy Blue Classic Stampin' Pad [ 147105 ]](https://lisascreativecorner.com/wp-content/uploads/2025/08/24d5a78ceb59d611d5342cf020b54e27.jpg "Balmy Blue Classic Stampin' Pad [ 147105 ]")
![Highland Heather Classic Stampin' Pad [ 147103 ]](https://lisascreativecorner.com/wp-content/uploads/2025/08/2a69ed88d15599c17a15ed9cd0fdbb43.jpg "Highland Heather Classic Stampin' Pad [ 147103 ]")
![Early Espresso Classic Stampin' Pad [ 147114 ]](https://lisascreativecorner.com/wp-content/uploads/2025/08/847b0318bad12e9bb38749cb4c42503a.jpg "Early Espresso Classic Stampin' Pad [ 147114 ]")
![Blending Brushes [ 153611 ]](https://lisascreativecorner.com/wp-content/uploads/2025/08/d18bb46238fe494e56152942490a1552.jpg "Blending Brushes [ 153611 ]")
![Sponge Daubers [ 133773 ]](https://lisascreativecorner.com/wp-content/uploads/2025/08/967ade1993a15d8f7edfa352753233e4.jpg "Sponge Daubers [ 133773 ]")
![Mini Glue Dots [ 103683 ]](https://lisascreativecorner.com/wp-content/uploads/2025/08/0cc098c39226f3139c89e8a433fc640c.jpg "Mini Glue Dots [ 103683 ]")
![Multipurpose Liquid Glue [ 110755 ]](https://lisascreativecorner.com/wp-content/uploads/2025/08/cbf2e687070fce5a1db2dd5ae70f80bd.jpg "Multipurpose Liquid Glue [ 110755 ]")
![Stampin' Dimensionals [ 104430 ]](https://lisascreativecorner.com/wp-content/uploads/2025/08/40efb008ee05b6faec44ebafc8937e58.jpg "Stampin' Dimensionals [ 104430 ]")
![Take Your Pick [ 144107 ]](https://lisascreativecorner.com/wp-content/uploads/2025/08/850345bd697d58c5374f00ec11962bda.jpg "Take Your Pick [ 144107 ]")
![Take Your Pick Crafter Tips [ 161602 ]](https://lisascreativecorner.com/wp-content/uploads/2025/08/0f86b8d5a5c2b695188bcbe76d95c7f6.jpg "Take Your Pick Crafter Tips [ 161602 ]")
![Simply Scored [ 122334 ]](https://lisascreativecorner.com/wp-content/uploads/2025/08/084b07971e19a73505487bdc02df7d30.jpg "Simply Scored [ 122334 ]")
![Stampin' Cut & Emboss Machine [ 149653 ]](https://lisascreativecorner.com/wp-content/uploads/2025/08/909f32cc4d93a35369fa22db36e19902.jpg "Stampin' Cut & Emboss Machine [ 149653 ]")


Will the cardstock be included for the actual cards along with cardstock for the die cuts?
Hi Sharon. Yes, the cardstock for the card bases will be included as well. 😊