Simply Inspired Blog Hop – Artfully Sent Christmas Card
Welcome to this month’s Simply Inspired blog hop! This month we are featuring Close to my Heart’s new Artfully Sent Cricut Collection. If you arrived from the fabulously creative Brenda Rose’s blog, then you are on the right path.

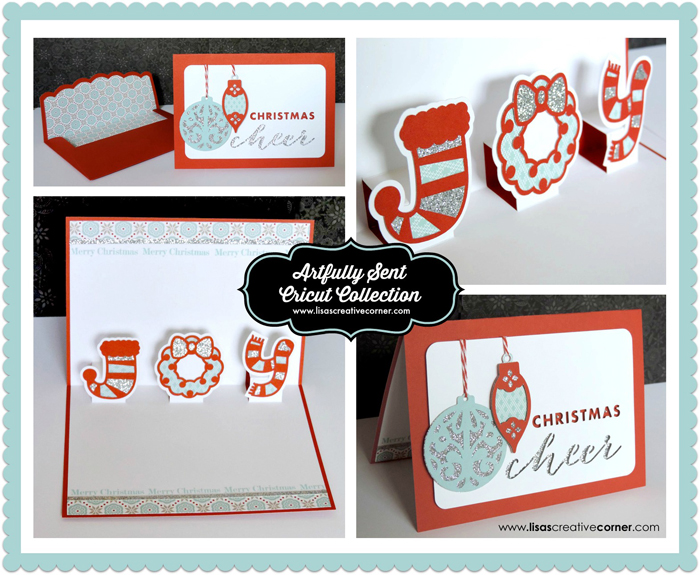
I have been having so much fun with this new Cricut Collection. I decided to get a jump start on my Christmas cards. To make my card today, I used the pop-up card on page 49 of the Artfully Sent booklet for the inside of my card and the Christmas Cheer card from page 46 on the front. To create the front of the card, I added a small piece of Glitter Paper behind the word “cheer” and then popped up the white “Christmas Cheer” card (cut at 4″ x 6″) with 3-D Foam Tape.
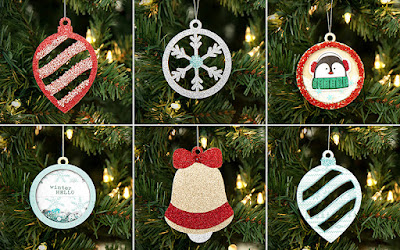
I added some ornaments (cut from the Art Philosophy cartridge and the Artiste cartridge) to the left side of the front panel with 3-D Foam Tape as well. I used some Glacier cardstock, a little Glitter Paper, and a patterned paper from the Snowhaven Collection. I also added a Bitty Sparkle in the middle of the cut out “R” and “A.”


To make the inside of the card, I brought the joy pop-up card from page 48 into Design Space and cut it at 7″ wide. Then I also cut the inside pop-up version of the robot card on page 28 because it had the 3 separate pop up sections. I layered the letters together and attached them to the pop-up sections that worked perfectly with my three letters. It was super easy to do and adds a fun surprise to the recipient of the card when it is opened.
I added a strip of patterned paper from the Snowhaven Collection to the top and bottom of the card. Then I stamped it with one of the many sentiments that comes on one of the Artfully Sent stamp sets in Glacier ink.


One of my favorite things about this great cartridge is that it comes with lots of different envelope shapes PLUS liners! So, of course I had to make one to go with my card. I used the envelope on page 49 and sized it to 8.75″ wide x 11.25″ high in Design Space. (This seems to be the perfect size to fit 5″ x 7″ cards.)
Thanks for stopping by. Now hop on over to Diana Veenendaal’s blog to see her creative project! (If you get lost along the way, you can see a list of all of the fabulous blog hop participants here.)
Lisa as always adorable creations! Beautiful card.
V
Thank you so much! *Ü*
I love your card and matching envelope with liner! Classy!
I also LOVE the idea of using a gem in the "open" letters. It bugs me to have those parts missing! (OCD?)
Thank you!
Sharli you are a woman after my own heart. I know it's trendy to have those open letters these days, but it really bugs me too. Sparkles are always a good bet to fill in those spaces. *Ü*
Gorgeous! I love the glacier with the cranberry!
Thanks my friend! xoxo
So beautiful! Adding those touches of glitter sparkle is just perfect!!
Thanks Morgan. Glitter always makes things more fun. *Ü*
Beautiful! You have a knack for making such clean, beautiful projects.
Thanks Blythe. *Ü*
Gorgeous card! I'm really loving the color combination! Thanks for sharing! ��
Thanks Jaime! xoxo
Gorgeous – inside, outside, and envelope! Love how you always pull everything together! 🙂
Thanks Dana. xoxo
Beautiful!! I love how everything of yours ALWAYS coordinates together! I had to take a peek again to see if the "Christmas" was above the cheer in the cartridge – and it is!! Just lovely!
Thank you Krista! *Ü*
Amazing art Lisa! You are always so inspiring!
Aww. Thanks Margi! xoxo
Darling as is all your beautiful heART!
Thanks Bren. xoxo
As always you rocked this card!!
Thanks Shalana! You are so sweet! *Ü*
Darling…as usual. Love.
Thanks Denise! *Ü*
Thanks Katy! *Ü*
So very pretty and I LOVE LOVE LOVE the envelope you made to go with the cards. 🙂
Attention to detail, on point as always. I have struggled with how to use those 3×4 cards on a card. this has given me the inspiration I needed. xoxo