Artfully Sent Birthday Cards

| | |

One of my favorite things about making my own cards is that I can design one card and then choose different colors, patterns, and papers to make a “boy” version and a “girl” version. These cards were inspired by the design I used on this card.

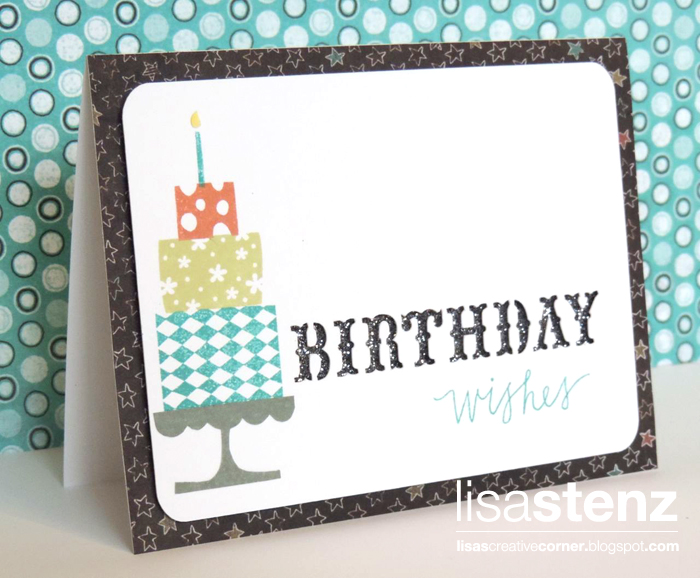
I brought the Birthday Girl card from page 25 of the Artfully Sent Cricut cartridge booklet into Design Space and deleted the word “Girl” by selecting Contour and then deselecting the letters G-I-R-L. I reduced the size of the card to 5″ x 3¾” to fit on a standard A2 card base.

The word Wishes, from the Lovely Birthday stamp set, was stamped underneath in Thistle ink on the girl card and Lagoon ink on the boy version. I stamped the cake on the left side from the Build-a-Cake stamp set. The cake plate was too wide, so I stamped in on a piece of scrap cardstock and then cut it out leaving off the two outside scallops. Then I adhered it to the card under the cake.

I adhered a piece of patterned paper from the Confetti Wishes Collection to the card base on the girl card and a piece from the Chalk It Up Collection to the card base of the boy card. Then I added a small piece of Glitter Paper to line up under the cutout of the word Birthday. I adhered the top panel to the card base with some 3-D Foam Tape.

I love having pre-made birthday cards ready when I need them. Stay tuned for more birthday card fun from the Artfully Sent Collection

Similar Posts

  • May ClubProject – Skylark Display Tray

    May’s Creative Club will be held on Thursday, May 15th at 7pm. We will be using Close to my Heart’s beautiful Skylark Collection to make this fun Display Tray. The project kit is $30 and includes all of the following:  (1) 12″ x 12″ wooden Display Tray Pre-cut pieces for each section from the Skylark paper collection (1) package (2 sheets) of Skylark Compliments Dimensional Elements…

  • Smiles Card

    I was inspired to make my card by this one made by one of my stamping heroes, Jennifer McGuire. Jennifer showed how to use a die to make a fun 3-D sentiment on her card. I improvised and used the “Smiles” image on my Artbooking Cricut cartridge. I cut it out 5 times from a…

  • February Promotions and Specials

    February Promotions and Specials ⎯⎯⎯⎯ ♥︎ ♥︎ ♥︎ ⎯⎯⎯⎯ Create Your Own Love Story Love Story Scrapbooking and Cardmaking Workshop! Introducing new scrapbooking and cardmaking workshop kits featuring the beautiful designs of the Love Story paper collection! These exclusive new scrapbooking and cardmaking workshops truly demonstrate the rich creative possibilities of the Love Story paper collection. Each cardmaking and…

  • Easter Nugget Tin

    I needed to whip up a couple of quick Easter gifts for my son’s preschool teachers and fell back on my old favorite Nugget Tins since I still had a few left from Christmas. I was kicking myself for not ordering Papertrey’s “Limitless Labels” but then remembered that I had the “Holiday Treats” set that…

  • A Special Gift from Me to You!

    I am so grateful for all of you who have helped my business grow this year. I am especially thankful for those of you who started out as my customers and quickly became my friends. Being a CTMH Consultant has provided such wonderful opportunities over the years, but the friendships I have made are priceless….

2 Comments

Leave a Reply

Your email address will not be published. Required fields are marked *