How to Scrapbook Multiple Photos using Flip Flaps
I’m so excited to share today’s special project with you! This scrapbook layout was created as part of a fun collaboration to celebrate my sweet friend Jayma Malme reaching 20K YouTube subscribers! 🎉 Each of us participating in the collab recreated one of Jayma’s projects with our own personal twist. I was especially inspired by one of her layouts where she turned a card kit into a scrapbook page — such a clever idea!
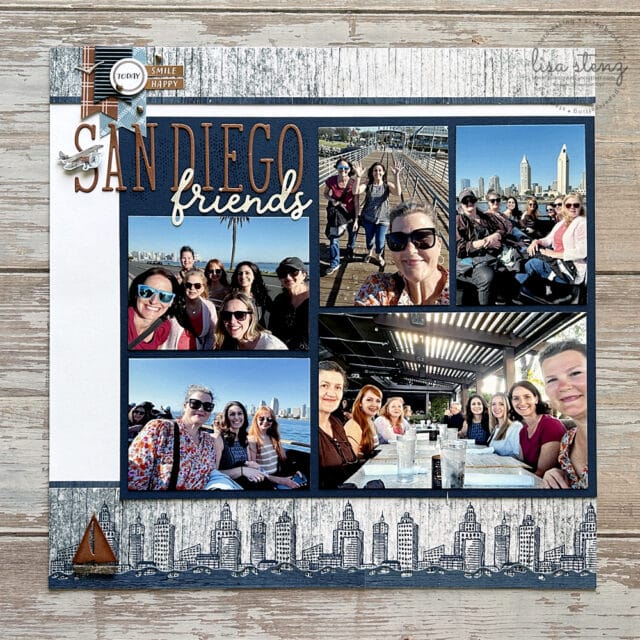
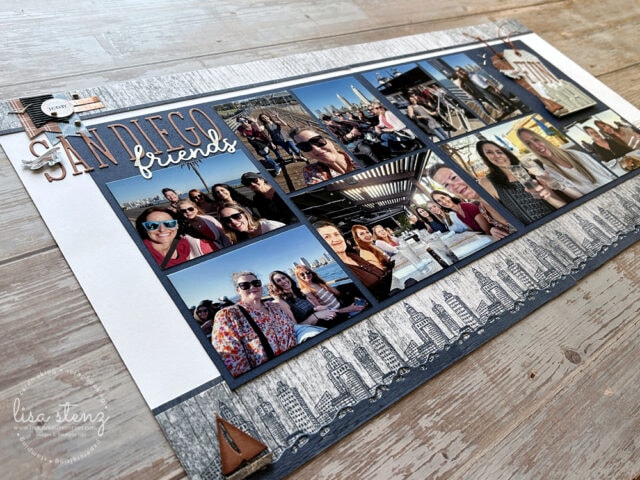
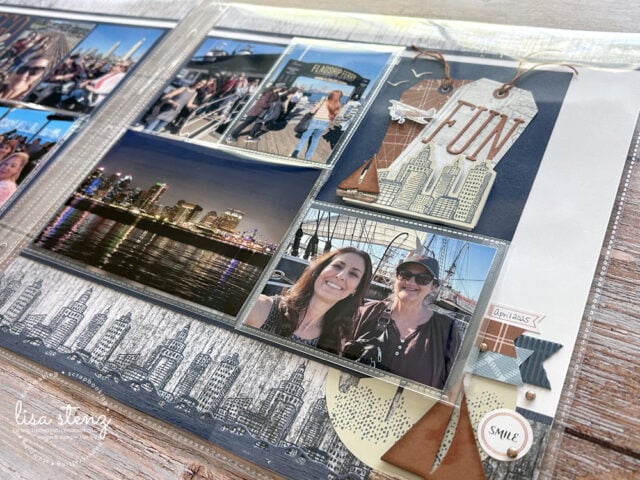
In my take, I used the Stampin’ Up! City Sights Card Kit to create a layout featuring photos from a fun day spent in San Diego with some friends. I also share how to include multiple photos on a scrapbook layout using Flip Flaps, which are a game-changer for adding more memories without overcrowding the page.
🎥 Watch the full video tutorial here:
Layout Details:
This double-page layout includes the following key elements:
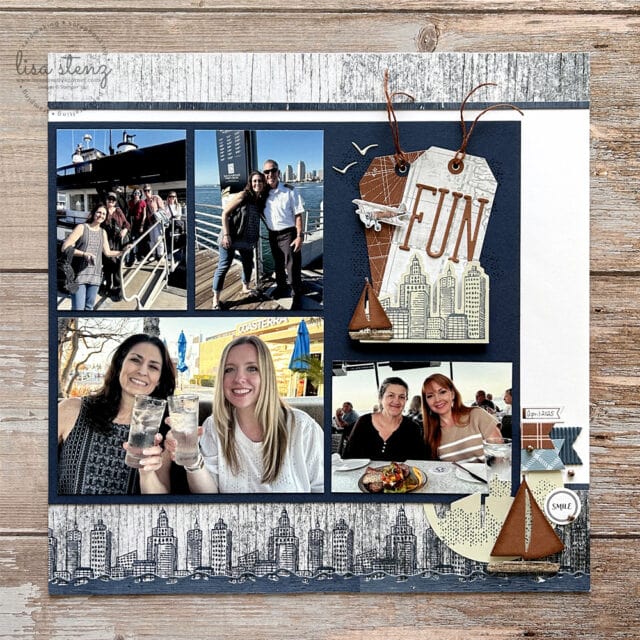
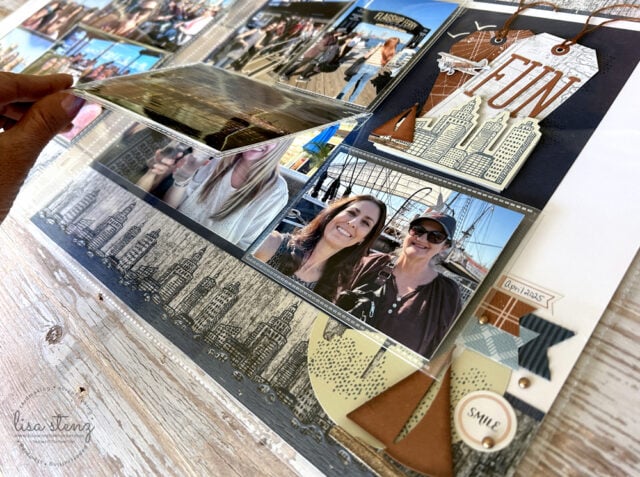
📸 Flip Flaps for Extra Photos
I used both 4″ x 6″ and 3″ x 4″ Flip Flaps to layer additional photos and journaling without taking up extra base space. They open up like mini photo books and are perfect for telling more of the story!
🏙️ City Skyline & Nautical Vibes
The layout blends urban and nautical elements — cityscape die cuts and stamps from the City Sights card kit paired with sailboats, seagulls, and a wave die cuts for that harbor feel.
🎨 Color Palette
I used Night of Navy, Basic Beige, White Willow, and Copper Clay cardstock to match the photos and convey a warm sunset tone. The woodgrain paper from the Country Woods DSP adds a weathered dockside texture.
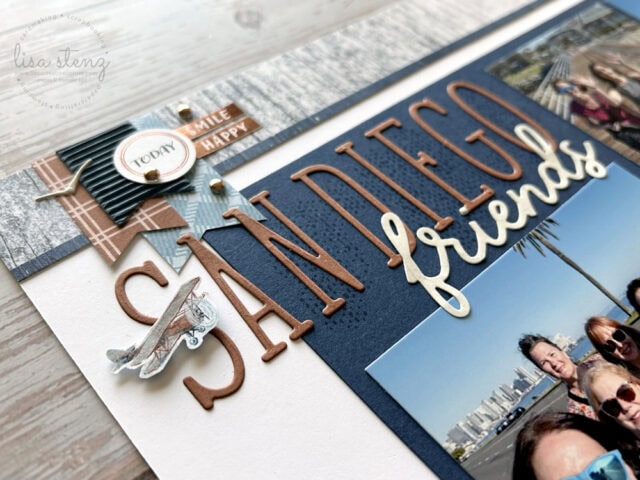
✨ Fun Embellishments
A couple of little airplanes from the new Sunrise Sailing Bundle coming out on May 6, linen thread, epoxy dots, and some layered banners finish off the design.

I hope this inspires you to try using card kits in new ways and to give Flip Flaps a try on your next layout! Don’t forget to check out the full collaboration playlist here to see all of the other amazing projects celebrating Jayma’s milestone.
Product List![City Sights Kit [ 163885 ]](https://lisascreativecorner.com/wp-content/uploads/2025/04/1137b2a65832672ae3917e8a5bc31ece.jpg "City Sights Kit [ 163885 ]")
![Country Woods 12" X 12" (30.5 X 30.5 Cm) Designer Series Paper [ 163393 ]](https://lisascreativecorner.com/wp-content/uploads/2025/04/9dcffbfc45259a9e2f66489331eb9975-1.jpg "Country Woods 12\" X 12\" (30.5 X 30.5 Cm) Designer Series Paper [ 163393 ]")
![Alphabet à La Mode Dies [ 160750 ]](https://lisascreativecorner.com/wp-content/uploads/2025/04/e321b9ab1f1c96a6762dac0df65ba1e0.jpg "Alphabet à La Mode Dies [ 160750 ]")
![Natural Tones Linen Thread [ 164071 ]](https://lisascreativecorner.com/wp-content/uploads/2025/04/cf5337a74f656460e58e6aecf3644ceb.jpg "Natural Tones Linen Thread [ 164071 ]")
![Night Of Navy 8-1/2" X 11" Cardstock [ 100867 ]](https://lisascreativecorner.com/wp-content/uploads/2025/04/3e65474632becf43f07166ddf0d980aa.jpg "Night Of Navy 8-1/2\" X 11\" Cardstock [ 100867 ]")
![Copper Clay 8 1/2" X 11" Cardstock [ 161721 ]](https://lisascreativecorner.com/wp-content/uploads/2025/04/b852faa80ca7ac614b673c2b342e22c0.jpg "Copper Clay 8 1/2\" X 11\" Cardstock [ 161721 ]")
![Basic Beige 8 1/2" X 11" Cardstock [ 164511 ]](https://lisascreativecorner.com/wp-content/uploads/2025/04/e59ee926cfc15d822e5de65b97488a80.jpg "Basic Beige 8 1/2\" X 11\" Cardstock [ 164511 ]")
![White Willow 12" X 12" (30.5 X 30.5 Cm) Cardstock [ 166703 ]](https://lisascreativecorner.com/wp-content/uploads/2025/04/ecd0677988a8c1e3125ef552965fd1b3.jpg "White Willow 12\" X 12\" (30.5 X 30.5 Cm) Cardstock [ 166703 ]")
![Night Of Navy Classic Stampin' Pad [ 147110 ]](https://lisascreativecorner.com/wp-content/uploads/2025/04/f96433192a86366e0ba32cb6efaa7a36.jpg "Night Of Navy Classic Stampin' Pad [ 147110 ]")
![Copper Clay Classic Stampin' Pad [ 161647 ]](https://lisascreativecorner.com/wp-content/uploads/2025/04/6aae519c15d4bd40ec62896a518de9e9.jpg "Copper Clay Classic Stampin' Pad [ 161647 ]")
![4" X 6" Flip Flaps Memory Protectors [ 166404 ]](https://lisascreativecorner.com/wp-content/uploads/2025/04/00959cb3591f9e87c5d52baa02506e7d.jpg "4\" X 6\" Flip Flaps Memory Protectors [ 166404 ]")
![3" X 4" Flip Flaps Memory Protectors [ 166405 ]](https://lisascreativecorner.com/wp-content/uploads/2025/04/9355b2126bc4266fec3a661b1db78b36.jpg "3\" X 4\" Flip Flaps Memory Protectors [ 166405 ]")
![Paper Snips [ 103579 ]](https://lisascreativecorner.com/wp-content/uploads/2025/04/1f09970097ea400c79ec2e42d288fffe-2.jpg "Paper Snips [ 103579 ]")
![Take Your Pick [ 144107 ]](https://lisascreativecorner.com/wp-content/uploads/2025/04/850345bd697d58c5374f00ec11962bda-2.jpg "Take Your Pick [ 144107 ]")
![Take Your Pick Crafter Tips [ 161602 ]](https://lisascreativecorner.com/wp-content/uploads/2025/04/0f86b8d5a5c2b695188bcbe76d95c7f6-2.jpg "Take Your Pick Crafter Tips [ 161602 ]")
![Multipurpose Liquid Glue [ 110755 ]](https://lisascreativecorner.com/wp-content/uploads/2025/04/cbf2e687070fce5a1db2dd5ae70f80bd-3.jpg "Multipurpose Liquid Glue [ 110755 ]")
![Adhesive Sheets [ 152334 ]](https://lisascreativecorner.com/wp-content/uploads/2025/04/fd31cfc385d68cb462b3d3ea84503f12.jpg "Adhesive Sheets [ 152334 ]")
![Foam Adhesive Strips [ 141825 ]](https://lisascreativecorner.com/wp-content/uploads/2025/04/e2fbd3cb39d3e16b0b0b5b3f0b43ea8d-1.jpg "Foam Adhesive Strips [ 141825 ]")
![Mini Stampin' Dimensionals [ 144108 ]](https://lisascreativecorner.com/wp-content/uploads/2025/04/dd5ef75bd31a32ecdc6a140a2d9ad7db-3.jpg "Mini Stampin' Dimensionals [ 144108 ]")
![Stampin' Cut & Emboss Machine [ 149653 ]](https://lisascreativecorner.com/wp-content/uploads/2025/04/909f32cc4d93a35369fa22db36e19902-4.jpg "Stampin' Cut & Emboss Machine [ 149653 ]")
![Take To The Sky 12" X 12" (30.5 X 30.5 Cm) Designer Series Paper [ 163436 ]](https://lisascreativecorner.com/wp-content/uploads/2025/04/251310e9fa7751ec6643a82db03d8c4e.jpg "Take To The Sky 12\" X 12\" (30.5 X 30.5 Cm) Designer Series Paper [ 163436 ]")
![Sweet Thoughts Memories & More Card Pack [ 162930 ]](https://lisascreativecorner.com/wp-content/uploads/2025/04/96ef59fa47ab316b2e6a8b9e847fd76c.jpg "Sweet Thoughts Memories & More Card Pack [ 162930 ]")