
August Project Kit – Zoe Artistry Card Kit
Cards | Cricut | Events | Kits | Project Kits | Promotions | Tutorials | Uncategorized | Workshops

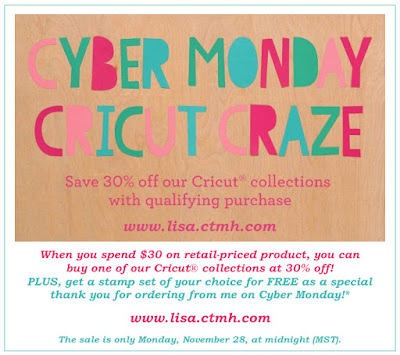
This month’s project kit is so much fun because not only does it use the fun new Zoe paper, but it also incorporates the brand new Artistry Cricut Collection! Plus, I have a special surprise for those of you who order the new Artistry Cricut Collection this month! Anyone who orders the Artistry Cricut Collection from me by August 31st, will receive this project kit for FREE!*
This month’s local class will be held on Thursday, August 20th at 7pm. (If you’d like to order a kit to be mailed to you instead, see shipping option below.) The project kit is $25 (see how to get the kit for free below) and includes all of the following to make a set of 6 cards (2 each of 3 designs) and (6) lined envelopes:


To find out more about my monthly “no-commitment” Creative Club, click here.
- (1) Zoe Paper Packet
- (1) package of Sparkle Clear Assortment
- (6) White Daisy 4¼” x 5½” Envelopes
- Pre-cut Cricut shapes
- Pre-stamped images (all stamps used in this project come with the Artistry Cricut Collection)
- Step-by-Step Instruction/Cutting Guide
- Link to Design Space file
***SPECIAL*** If you order the Artistry Cricut Collection from me during the month of August, I will send you the kit for FREE!!!!*
Additional supplies needed to complete the project:
Adhesive of your choice
Scissors
Paper Trimmer
Artistry Cricut Collection (images will be precut and pre-stamped in this kit, but you will need the Cricut Collection if you would like to make more in the future.)
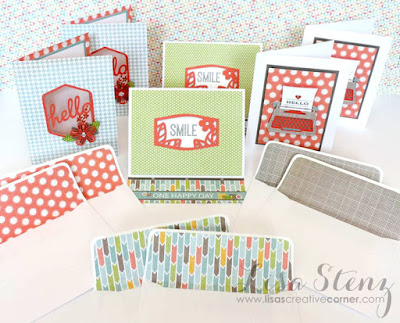
You will make 6 cards (2 each of 3 designs) and you will learn how to line the inside of your envelopes to match the cards.

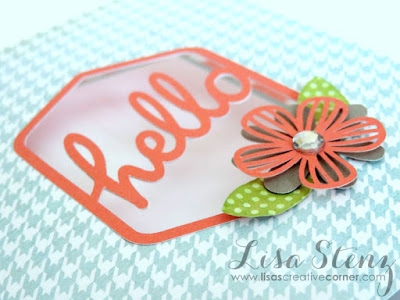
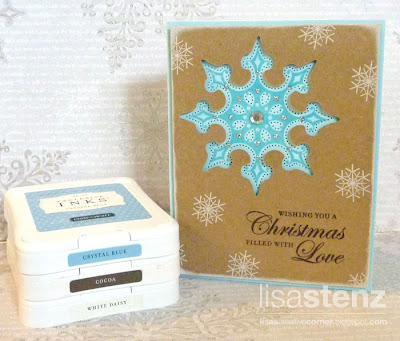
Card #1 has a sweet “hello” message floating on the inside of the die-cut center and a delicate flower on the corner.

This is one of my favorite images on the new Artistry Cricut cartridge.

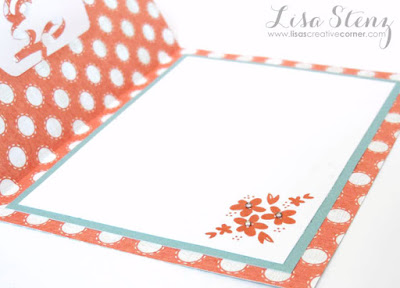
The inside of card #1 has generous space to write your message along with a stamped flower cluster in the bottom corner.

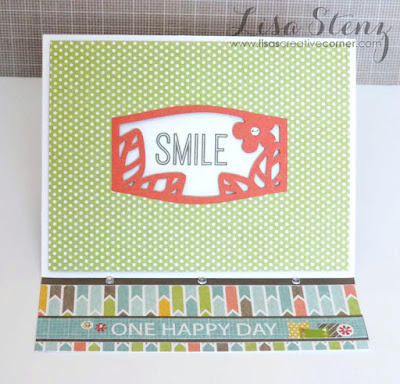
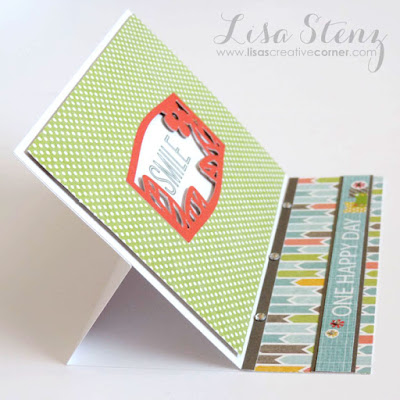
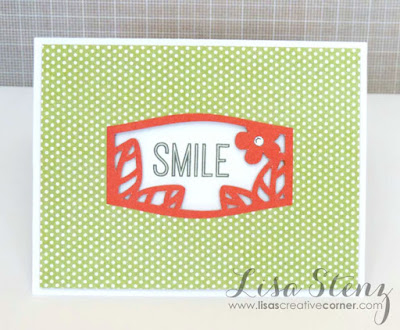
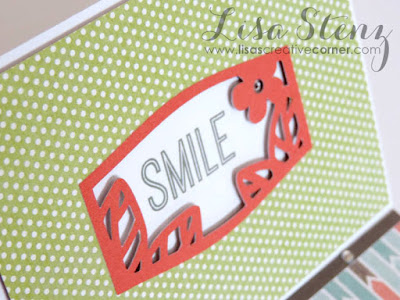
Card #2 is an easel card that stands up to display the simple card front.

This is what the card looks like from the side when it is standing.

When the card is closed, your recipient sees a sweet message to “smile.”

Although the card front is simple, it has some dimension to make it more interesting.

The bottom of the inside of the card has another happy message.

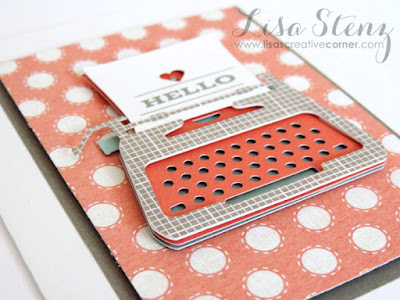
Card #3 looks simple at first glance…

…but when you look closely, you will notice how much depth it actually has. This is a REALLY fun card to make and I know the recipient will enjoy it as much as you will making it.

Isn’t the cute die-cut heart with the bitty sparkle inside sweet?

Thank you for the great response.
Kits are now sold out.
To find out more about my monthly “no-commitment” Creative Club, click here.
You do not need to be local to participate. *Ü*


Cute cards, Lisa. I love the colors in this new collection.
Thanks Casandra! You are very sweet. I love the colors in this new collection too. *Ü*
Wow! Amazing cards!
Thanks Anita! *Ü*
Love this card set, Lisa. Just beautiful!
Thanks so much Doreen! xoxo
Lisa on the step by step instructions/cutting guide are there deign space instructions, specifically the cut out portion on card base and zoe mat.
Thanks
debbiepgarrett@gmail.com
Hi Debbie, yes there will be a step-by-step guide on how to cut out the center portion on the card base and Zoe mat. I am still working on the instruction guide, but it will be ready by the time the kits ship on the 22nd. *Ü*
Lisa amazing work! Forgive me if this comment appears twice. I tried to leave a comment after seeing the post on Pinterest but I don't think it worked so I am trying again. I am interested in purchasing your kit to offer as a class, giving you the credit of course. Is this something you would allow. If so I noticed that it says above if you order by 8/7 it will ship on 8/22. Is there anyway that I could have it in time to prepare the examples for my open house on 9/1. Thanks for all the inspiration!
Hi Nickie,
Thanks for your sweet comments. I am so glad you like the project. I am more than happy to have you use this project with your customers as a class. You can either purchase the full kit or you can order just the project guide and create the kit yourself. (I will have the project guide ready to order by the 20th and will post when it's ready here: http://lisascreativecorner.blogspot.com/p/consultant-project-guides.html)
If you order the full kit, I will have yours ready to mail by the 22nd, so it should be to you in plenty of time to prep samples for your open house. *Ü*
Thanks Lisa! I ordered the kit! Thanks so much! I look forward to displaying it at my open house.
Thanks Nickie. *Ü*
I just ordered your kit. really cute cards. I am not sure how to get my address to you. if you don't have it maybe you could email me at stampmary@msn.com and I can give it to you. look forward to have my card group make these cards. thanks again. Mary Thomas
Hi Mary,
Thanks for ordering the kit. I sent you an email. *Ü*