Two More Projects with March’s Product of the Month: Notes of Spring
I have a few more projects to share using March’s Product of the Month, the Notes of Spring stamp set. This set is just so sweet and versatile, and I’ve loved creating with it.
Mini 3″ x 3″ Card Set with Coordinating Envelopes
The first project is a set of simple and adorable 3″ x 3″ mini cards, each with a coordinating envelope.
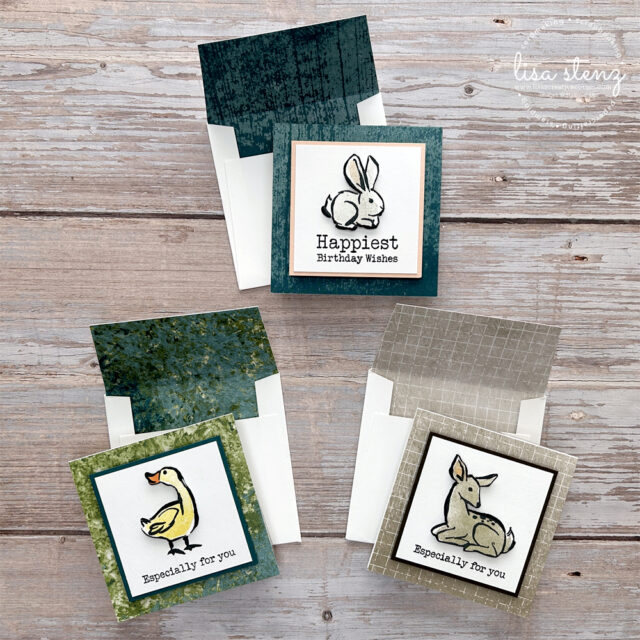
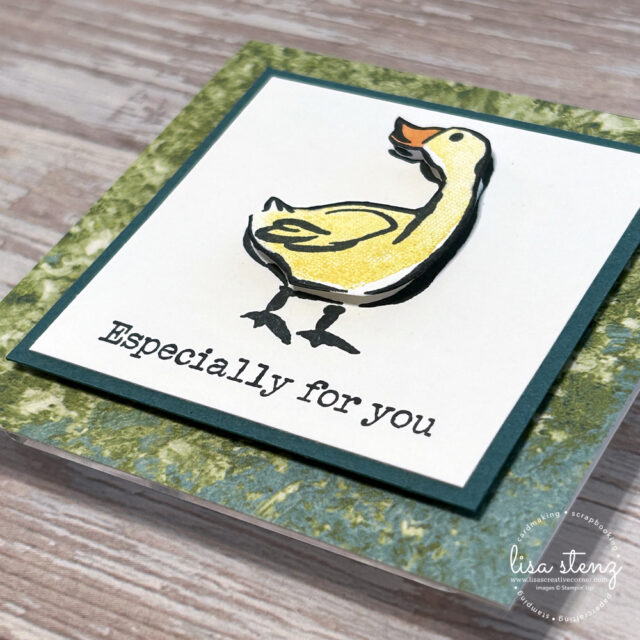
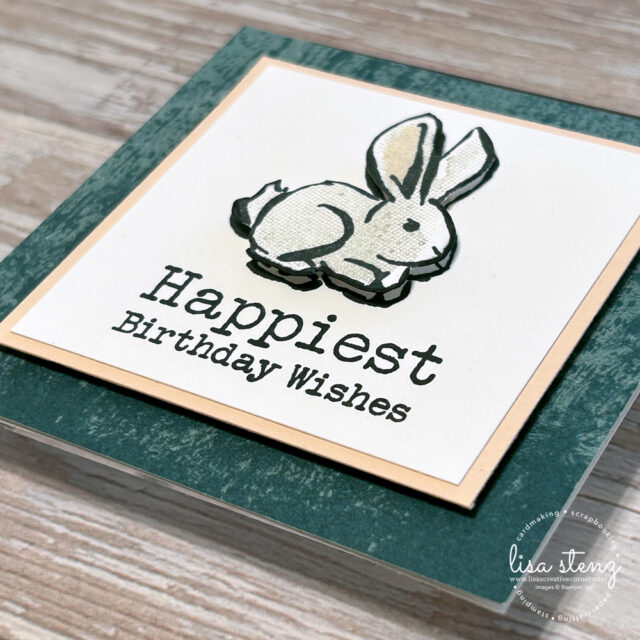
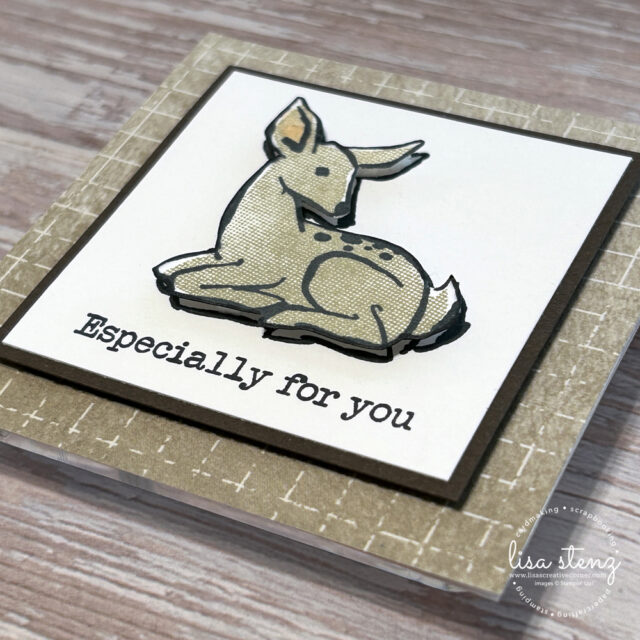
To create these cards, I stamped the cute little animals onto a 2¼” x 2¼”piece of Basic White Thick cardstock using Memento Black ink, then added a sentiment underneath.
Next, I stamped the same animal again onto scrap cardstock and added shading using the coordinating stamp. After trimming the images out with scissors, I popped them up directly over the original stamped images using Dimensionals for a fun layered look.
I matted the stamped panel with coordinating cardstock, then adhered a piece of Nature Walk Designer Series Paper to the card base. Finally, I attached the stamped panel with Dimensionals to give the card a little extra dimension.
Be sure to check out the video below to see how I created the coordinating envelopes. You can download the free envelope template too! Download the envelope template here.
Simple Duck Reflection Card
The second project is a clean and simple card with a really fun technique!
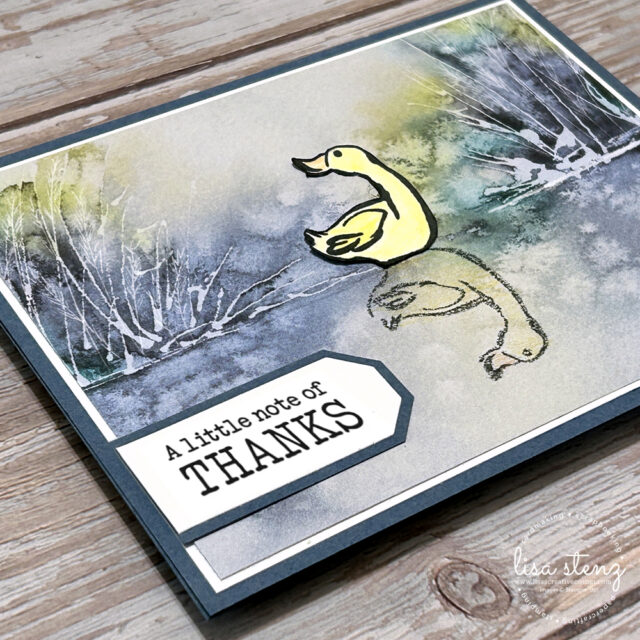
I started with a piece of Thoughtful Journey Designer Series Paper for the background which makes the perfect peaceful scene. I stamped the duck image in the center, just above the “water.”
To create the reflection, I stamped the duck onto a scrap piece of Window Sheet, flipped it over, and carefully pressed it just below the original image. This transfers a mirrored image and creates a beautiful reflection effect!
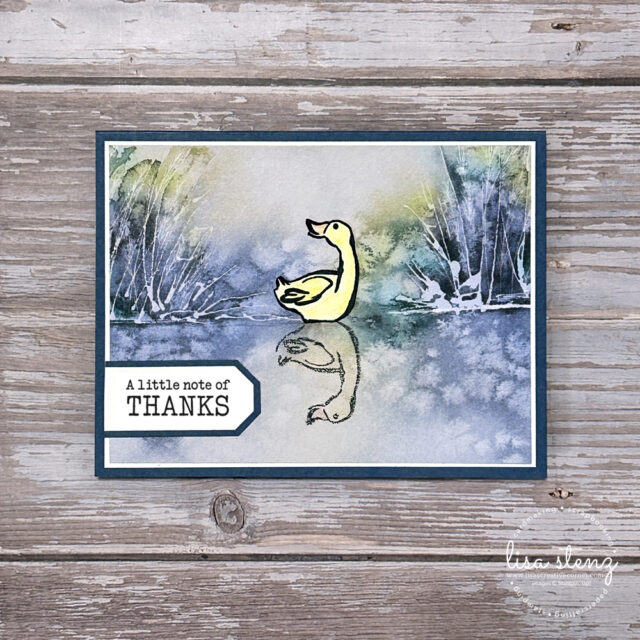
Then, I stamped the duck a third time onto Basic White cardstock, colored it with Watercolor Pencils, and blended the color using a Blender Pen. After trimming it out, I adhered it over the original stamped image for a layered focal point. I also lightly colored the reflected image to soften the look.
To finish the card, I matted the DSP with Basic White cardstock and adhered it to a Misty Moonlight card base. The sentiment was stamped on Basic White and die cut using the small bracket shape from the Words of Beauty dies.
I matted the stamped DSP with a piece of Basic White cardstock and then adhered it to a Misty Moonlight card base. To finish off the card, I stamped the sentiment onto a piece of Basic White cardstock and die cut it using the small bracket shape from the Words of Beauty dies.
Don’t Miss the March Product of the Month
Remember, you can get the Notes of Spring Stamp Set for just $5 with your $75 purchase, but only while supplies last. Click here for more information on the Product of the Month program.
Product List![Notes Of Spring Photopolymer Stamp Set (English) [ 167979 ]](https://lisascreativecorner.com/wp-content/uploads/2026/03/a208a0d30cf3b29e18a5f48f880b39a0.jpg "Notes Of Spring Photopolymer Stamp Set (English) [ 167979 ]")
![Nature Walk 12" X 12" (30.5 X 30.5 Cm) Designer Series Paper [ 166912 ]](https://lisascreativecorner.com/wp-content/uploads/2026/03/493c11f4ebf4196bb81ff32cc0c613d5.jpg "Nature Walk 12\" X 12\" (30.5 X 30.5 Cm) Designer Series Paper [ 166912 ]")
![Thoughtful Journey 6" X 6" (15.2 X 15.2 Cm) Designer Series Paper [ 163303 ]](https://lisascreativecorner.com/wp-content/uploads/2026/03/871670c765ad162830596f19d507d04c.jpg "Thoughtful Journey 6\" X 6\" (15.2 X 15.2 Cm) Designer Series Paper [ 163303 ]")
![Words Of Beauty Dies (English) [ 167089 ]](https://lisascreativecorner.com/wp-content/uploads/2026/03/ef1e0c465507d08d82660b79a8da6dd3.jpg "Words Of Beauty Dies (English) [ 167089 ]")
![Watercolor Pencils Assortment 1 [ 161700 ]](https://lisascreativecorner.com/wp-content/uploads/2026/03/4e40d035d9192ca0ad9454de03fd1e4d.jpg "Watercolor Pencils Assortment 1 [ 161700 ]")
![Blender Pens [ 102845 ]](https://lisascreativecorner.com/wp-content/uploads/2026/03/09cf3567257517a249a2bb9e00859809.jpg "Blender Pens [ 102845 ]")
![Basic White 8 1/2" X 11" Thick Cardstock [ 159229 ]](https://lisascreativecorner.com/wp-content/uploads/2026/03/8c2a8a3b8ff25be10ec2d7cecdaecf11.jpg "Basic White 8 1/2\" X 11\" Thick Cardstock [ 159229 ]")
![Petal Pink 8-1/2" X 11" Cardstock [ 146985 ]](https://lisascreativecorner.com/wp-content/uploads/2026/03/71810bd804cb036c54a068250576c418.jpg "Petal Pink 8-1/2\" X 11\" Cardstock [ 146985 ]")
![Pretty Peacock 8-1/2" X 11" Cardstock [ 150880 ]](https://lisascreativecorner.com/wp-content/uploads/2026/03/0935f81d87a140eaa7d99266d54c6aef.jpg "Pretty Peacock 8-1/2\" X 11\" Cardstock [ 150880 ]")
![Misty Moonlight 8-1/2" X 11" Cardstock [ 153081 ]](https://lisascreativecorner.com/wp-content/uploads/2026/03/0cf980b5eab06a915e9079d14c7d4e76.jpg "Misty Moonlight 8-1/2\" X 11\" Cardstock [ 153081 ]")
![Early Espresso 8-1/2" X 11" Cardstock [ 119686 ]](https://lisascreativecorner.com/wp-content/uploads/2026/03/026fbe988401090731381a32b8803c32.jpg "Early Espresso 8-1/2\" X 11\" Cardstock [ 119686 ]")
![Window Sheets [ 142314 ]](https://lisascreativecorner.com/wp-content/uploads/2025/12/ceeaf06bbab5343945436352a70657d6.jpg "Window Sheets [ 142314 ]")
![Tuxedo Black Memento Ink Pad [ 132708 ]](https://lisascreativecorner.com/wp-content/uploads/2026/03/89bd7278b062cae183ee334b221c9dcd.jpg "Tuxedo Black Memento Ink Pad [ 132708 ]")
![Daffodil Delight Classic Stampin' Pad [ 147094 ]](https://lisascreativecorner.com/wp-content/uploads/2026/03/cde7a562247662f8f15a62db08e7a965.jpg "Daffodil Delight Classic Stampin' Pad [ 147094 ]")
![Crumb Cake Classic Stampin' Pad [ 147116 ]](https://lisascreativecorner.com/wp-content/uploads/2026/03/3c6267795fa27f31ef206e04135d44e0.jpg "Crumb Cake Classic Stampin' Pad [ 147116 ]")
![Gray Granite Classic Stampin' Pad [ 147118 ]](https://lisascreativecorner.com/wp-content/uploads/2026/03/8484b93c73aafbf5818ee89e66784459.jpg "Gray Granite Classic Stampin' Pad [ 147118 ]")
![Secret Sea Classic Stampin' Pad [ 165285 ]](https://lisascreativecorner.com/wp-content/uploads/2026/03/26befe42d82e279226f7f60fbaf639d9.jpg "Secret Sea Classic Stampin' Pad [ 165285 ]")
![Petal Pink Stampin' Blends Combo Pack [ 154893 ]](https://lisascreativecorner.com/wp-content/uploads/2026/03/b0a786e13613bd63b32e4e0f60450c02.jpg "Petal Pink Stampin' Blends Combo Pack [ 154893 ]")
![Multipurpose Liquid Glue [ 110755 ]](https://lisascreativecorner.com/wp-content/uploads/2026/03/cbf2e687070fce5a1db2dd5ae70f80bd-1.jpg "Multipurpose Liquid Glue [ 110755 ]")
![Stampin' Dimensionals [ 104430 ]](https://lisascreativecorner.com/wp-content/uploads/2026/03/40efb008ee05b6faec44ebafc8937e58.jpg "Stampin' Dimensionals [ 104430 ]")
![Stampin' Cut & Emboss Machine [ 149653 ]](https://lisascreativecorner.com/wp-content/uploads/2026/03/909f32cc4d93a35369fa22db36e19902.jpg "Stampin' Cut & Emboss Machine [ 149653 ]")